Hello crafty friends..
Welcome to my page today. I am seeing some lovely colors coming up on the
walls at home and that has really inspired me with the current project and also
keeping in mind some lovely challenges.
Had this boring wooden wall clock for 21 yrs now (wedding gift) and I
thought it was high time for makeover.
This was going to be in the family area
and keeping the colors of the room and the flavor of the season I decided to
give a romantic touch to this wall clock! I was also challenged by my husband
that all my home decor projects have a “feminine” look to it and so I told
myself this one is NOT going to be that way! So no floral embellishments!
Step1- I removed all the working parts of the clock and kept it safely.
This lovely decoupage napkin with a couple and wine is what triggered the
romance actually! I started by altering the round dial. I cut a circle to size
from a cereal carton and then covered it with black gesso. Once dry, I covered
it with white glue and before it dried applied chalky finish "everlasting".
Look at
those cracks...my fav technique for quick cracks. I love the black thru the
white. I then adhered the napkin to the round base using America decor
decoupage glue. Loved how the couples withstood the cracks, lol! You can see
them thru....Inked the edges with fired brick DI and my altered dial was
ready...no not yet. I covered the needles with black and red alcohol inks, and
also had some black color splats here and there! Done.
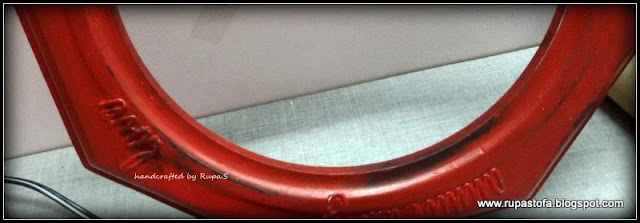
Step 2- Now for the hexagonal wooden frame. It was a challenge to do any
texture here as it has some natural grooves and the width was very less. I dint
want to do decoupage and decided to have some diecuts!
Love is a lifelong affair and not just a one day fling...says me! Hence, an array of
words from the Sizzix thinlits die. After adhering them, gave a coat of black
gesso.
Once dry, gave a coat of America decor chalky finish “Romance”. Love the
red and then went about distressing with a mild sand paper to reveal the black
beneath and also some dry brushing of black in spots.
When this dried, I took
some black gesso in my fingers and rubbed it on the die cuts to highlight them.
Sealed it with a coat of matte finish varnish.
Step 3- I wanted a change from the regular clock and decided to give some
faux pendulum to it. I die cut the hearts using cereal box carton and TH
alterations die! Those twins are adorable. I wanted to give a faux distressed
metal look. Ran it thru my new sizzix embossing folder and colored with black
gesso and then chalky red. Once dry, applied the archival black ink directly on
the raised pattern and also inked the edges with the same. Some splats with brushed
pewter DS and my metal hearts were ready to dangle.
The antique metal chain
gave the authentic pendulum look!
Pretty simple steps and I managed to give a new look to the clock except that
I cannot decide where to hang it... on the blue wall or the white wall.
What is
your choice???
Thank you so much for stopping by
and makes me really happy to read what you have to say about this romantic
clock.
I would like to enter the following challenges too...
Lulupu – Heart and arrows ( the heart is obvious and the arrow... have a
quick look at the needles!)
Eclectic Ellapu – Pink team, Love
Scrapki wyzwaniowo- Masculine project
LTSCB- have a heart
TIOT- A fine romance
Southern Ridge trading Company- anything love
Frilly and Funkie- enjoy your embossing
Simon wednesday Challenge- have a heart
Deco Art products used-
Americana decor black gesso
Chalky finish paint Romance,Everlasting
Decoupage glue
Matte varnish
Until my next creative journey,
Happy crafting and recycling.
Cheers.


