Wednesday, 1 April 2015

Wonderful Cozy Moments...


Hello Crafters..
Welcome to my page today ! Its sunny and bright here in Bangalore and yes, the nature is showing signs of new life! I love the fresh green leaves popping out and especially the smell of jasmine in our garden! It’s a delight so sip my morning cuppa with this to watch and smell, lol!
 Schools here have shut down for the annual vacation and that means trouble at home with the little one bored and behind my back! But yes, we love to craft  and so you will still get to see very little from my side for the next 2 months!

This month at Rhedd’s Creative Spirit we have “Anything Goes” as always but only mixed media or altered art. Please do remember that. I have an altered spool for you this month…a spring/ summer creation with the lovely papers from Graphic 45 French Country Collection!
The papers are so warm and cozy in itself and so I decided to do a scene to go with that! A lovely garden with flowers and birds and a window to look out too.

I chose some co ordinated papers in bright sunny colors from the pack to wrap the spool and then applied some crackle texture paste thru the bricks stencil. Heat embossed the window, shutters and the little trough in white and had them in place. Of course they had the slight worn out look with scrapping here and there!

The window dressing is using some marble hand made paper on which I have used my new stamps from KaiserCraft and the sentiment was perfect for the scene! You agree…
The planter is bursting with greenery and made some tiny bright flowers using TH tattered florals. The final dressing however is the polka dot Georgette ribbon bow which adds that “ ooo so pretty” look…what say?
Coming to the top of the spool, I made a scalloped square photo frame in chipboard and covered it with the lovely PP and inside there is a rusted copper lining if you see closely. I made that with some foil paper, ran it thru an embossing folder and colored it with acrylics and perfect pearls in copper! A perfect spot for a family picture..
The half wooden spool from Paper Artsy is also aged with some texture paste and distress stain in picket fence and walnut stain. It however holds some lovely white rose buds and also a cute little butterfly waiting to reach up there!
The sunflower is using CLD (DL 121) and CLD cutie fringe. I placed on a bed of coconut coir for dimension along side some green leaves. The vintage copper lamp post too is using CLD(B130) and it has a cute little bird house. It is a stamp and die set from Marianne Designs and I so so love it! It had to house a few birds and so came those two little love birds using IO dies!
I also made a cute coir nest hanging from the birdhouse but looks like the birds want to enjoy the outside world, lol!
The grass border is using IO dies and the fence…any guesses??? Those are remnants of the TH bird cage die…can you believe it, tied together with some copper wire! They have been aged too with some crackle paste and distress stains and the birdie seems to love perching on it!
That’s the story of my altered spool but wait wait….don’t leave. There is more to it than what you see here.
Do you really think I had a big wooden spool to alter…I wish I had, But who was giving up? I made my own spool using some empty brown tape rings and some old CD”s !!!
 Here we go.. so the spool actually opens up and the lid can be a separate decorative piece! Ta da…
And the  body of the spool can be a lovely pen stand or even hold some Easter goodies…yay! The ribbon looks lovely here...
 I would love to receive something like this, loaded with lots of surprise and that is how I satisfy my self, by making these things for myself, lol!

I am sure you can now a make a spool too at home and go ahead surprise your loved ones with these and don’t forget to take part in the challenge this month at Rhedd’s Creative Spirit. I leave you on that note ..phew! But just more to tell you that I love reading your comments and am so thankful that you decided to stop here today to take that little time off to share some love…
I would like to have my “faux spool” enter the following challenges!

Frillie and Funkie – add a ribbon
Cheery Lynn Designsblog- Back to nature
 Sentimental Sundays – Spring flowers plus a sentiment
 613 Avenue Create- Anything Goes
The CorrosiveChallenge Blog – Hop into Spring
That Craft Place – Easter/ Spring
ArtisticInspiration – AG with flowers
TIOT- They who have wings
SOS - No foolin ( faux spool here,hope that qualifies! and faux metal frame)
CCCB - polka dots
MMM- Recycle/ Upcycle with a twist of flowers
Our Creative Corner- color your world

Until my next Creative Journey,
Happy Crafting and Re Cycling
Hugs.


Friday, 20 March 2015

Dreams come True !

Hello Crafters,
Welcome to my page today and I have some good news for you.
By now, you all know my love for Vintage and it was a dream come true moment when Chris asked me to guest design this month at A Vintage Journey for their blogoversary.
The challenge this month is "Anything Tim" and as for me, all my projects have a (over)dose of Distress and  Vintage .A blog that inspires me the most and the products that I can't do without, I just had to take part in the celebration!
Do drop in there to know a little bit more about me and also to take part in the challenge and the celebrations. The goodies to be won are endless and irresistible!
It was my other dream to have a drift wood décor piece and today I present to you my “faux drift wood”  deco item which can light up any table. After all we are talking about celebrations at AVJ, right…

To make the drift wood, I used a horizontal piece of box, made a few circular openings on the top ( you will see why in a while) and inserted the empty tape rings.

 I stuck layers of tissue paper and cheese cloth and then spread homemade texture paste with a spatula all around the box. Once dry, I took my first collection of Distress stains, picket fence, walnut stain, brushed pewter and weathered wood and applied them and voila, my lovely faux drift wood piece was ready. Doesn't it look like it one of those pieces “washed off “the shore?
For the front panel: I have printed this lovely table quote from the net on kitchen tissue and have adhered it on canvas cloth with gel medium. I aged the canvas with DI antique linen and Vintage photo andflicked some black soot distress stain too.

The edges have been given a shabby look by machine stitching. I Have fastened the banner on the panel with TH hardware findings, which have been painted with black soot and brushed pewter D Stains and then “rusted up” using paper Artsy rusting powder.

The side panels: I made a faux frame using garden twigs and painted it with picket fence and brushed pewter D stains.

 I then printed the table manners quote and then framed it behind the frame with an acetate sheet too from packaging. Simple embellishments here, with a resin star fish cracked up with picket fence distress crackle and then walnut stain to highlight the cracks.
The back panel: A miniature banner that says it all. I dipped it in UTEE to get a glassy finish and have hung with natural twine.

 I have a thick layer of coconut coir for some dimension and texture here. I wanted the back to be simple to reveal the “faux texture” here. Looks good right?
Floral embellishments in the front: I love making them! All these lovelies are made using mostly TH tattered florals die. It’s amazing that you can make  a wide range of flowers with this single die. One of my favorites and I can’t do without it! The foliage too is mainly TH and the lovely ferns are using Tattered lace die.

The subtle colors of the flowers are all using distress inks and I wanted a soothing color palette on the drift wood, nothing too bright. I also did a “Tammy Tutterow” bow …colored the seam binding with DI and made the bow using her instructions to make a handmade bow maker!
The butterfly was my first experiment with D stains. When I got the package, I just opened the package and tried out the marbling technique with the few colors that I have and ran a water color paper over. I took all the stains in a lovely rainbow pattern and I use the monarch butterfly die to get this one. One dip in UTEE and this delicate thing turned out to be a toughie!
The little bee is a stamp and has been colored using D inks and sipped in UTEE too. A closer look and you can see the rusted hardware and a customized Ideology token! Do you see it hanging there, lol…yes I made that with a token die and D stains and wrote “avj” just so that it reminds me of this wonderful day!
The entire piece weighs like real drift wood and some wooden feet colored with picket fence D stain helps it to balance well!
Phew! Ready for a little more…
The Top panel: is where the surprise is…remember the circular cut outs? What do you think it is for???
Have a look…this is ultimately how I envisioned this drift wood to be on the table…
After all, “The fondest Memories are made gathered around the table” right… and with celebrations on here at AVJ, don’t you think the table needs to be brightened up…here it is…
With the candles and the cutlery…
A closer look at the center and you can see a battery operated LED candle glowing beneath the lovely lotus!
As the sun sets, it gets warmer…
The back side with the add on’s..”BON APPETIT”!
Finally, the end is here. Thank you so much for putting up with my loooong post…I had to share every bit with you, after all it took me 4 days to finish this!
Thank you Chris, Brenda and the entire AVJ team for this opportunity and hope this satisfies your creative needs and makes you play along the “anything Tim” challenge.

I would like to enter my drift wood decor in the following challenges...
Inspiration Journal - Spring
That's Crafty Challenge - wings"n" things
Unruly paper Arts- I am lucky ( can't get luckier being a guest at AVJ)
The Shabby tea Room - Spring Blooms
City Crafter Challenge Blog - inspired by the colors, beach, drift wood, dinner ware, star fish, lovely blooms!
(PIN) spirational Challenge- Spring
Lawnscaping Challenge - Distress (there is a lot of it!)
MIXED MEDIA WORLD - Anything Goes
Re cycle, Re purpose, Re invent- Anything goes
Until my next creative journey,
Happy Crafting and re cycling.

Cheers.

Sunday, 15 March 2015

Faux leather tutorial

Hello Crafters,
A big warm welcome to all of you.
Do you remember my "faux leather" journals that I had made a month back and I had promised a tutorial too for the same?


Well if you would love to make a journal for yourself then do hop over to Rhedd's Creative Spirit where I have full tutorial on the technique and how to make a junk journal using some coffee stained papers!
Yummy, can you smell it here?


No, you cant...hop over here and  leave me some love too! I just love it.


Big Hugs.

Wednesday, 11 March 2015

Remember the now...birthday wishes!

Hello crafters..
A big warm welcome to all my new followers and to those who are already with me!
I have a “special” project to share with you today, a box that I altered as a keep sake box for my husband! His birthday is in a few weeks and I thought I will give him something that he uses everyday.
I wanted a place where my husband could keep this daily stuff like the wallet, id, cards, pen, specs and all those little things that he gets back from the office every day and so I made this box. This will be a one stop place for his daily treasure, hopefully!
 
As I told you before, I am “doing up” the interiors of my house and so I made a box that will sit on his dresser. I wanted to subtly to remind my husband to keep things in their place. In these 20yrs I have failed miserably in this part but I always keep trying, lol!
I hope this box will make him want to keep his daily treasures here!
I have up cycled a card board box by altering its opening and the closure flap to fit my needs. I wanted it to withstand the daily wear and tear and so decided to make it look like a combination of wood and leather…both macho elements!
I knew that I could do it with all the Tim Holtz products and the techniques that I have learnt in my 2 years of crafting! Why fear when the master is here, lol!
For the lid, I gave a few layers of gesso and then colored with layers of distress stains (my new buy) Picket fence and broken china. I sanded in some areas and also dry brushed gesso in places for a white washed old look.
Then came some layered stenciling and stamps using TH cargo stencil and gothic. I  used the numbers from the stencil and his stamps to jumble up my husbands date of birth on the box! I also did some random script stamping.
For the outer sides, I adhered pages from an old atlas which just complimented the blue of the lid. I then swished out some homemade texture paste, added  some fine grain sand and some brown acrylic colors and went around all the sides of the box to create  random texture with a spatula.
As it dried I rubbed some perfect pearls in copper to get that slight metallic look. I inked the edges of the box with archival black and at this point I sealed the entire box with 2 coats of gloss medium. Now it is a solid box, unshakable!
Embellishments  for men is easy, NO FLOWERS! I hand wrote the famous quote from Tim and inserted it behind a chip board film strip. It was as if the focal quote was made with my husband in mind who is so absent minded! Just the one for him…thanks Tim.
The hinges from TH hardware findings were cut from grey board and gave a coat of picket fence distress crackle paint and rubbed in vintage photo stain in the cracks. The same for the film strip too.
From the film strip there is an interesting interactive feature dangling…a vintage clock charm, an altered resin key and lovely “timely thoughts” mini tags all held together in a metal chain and Ideology trinket pin.
The box has magnetic closures and for the flap, I made vintage white printed button using a die and dipped in UTEE and then strung a jute twine to make a bow. This conceals the magnet.
The keyhole is a TH die too and has the same yummy texture with the worn out metal look.
The box when opened has some interesting things too…
The open lid has an acetate pocket where he can keep the visiting cards. The TH vintage car stands proudly there and some tickets to make the man happy on his journey, lol! The masculine embellishments, you see! I love those little tickets clipped on the pocket!
The box in itself has plenty of room to keep a wallet, a spectacle case, pen and some papers too. I made a mini book using note book stamp from Whimsy…this is just so vintage and romantic! Some quick notes, hopefully he will “remember” to use it, lol!
The inside of the box is lined with atlas pages and faux leather paper using basket weave embossing folder and have rubbed in perfect pearls on this too to get the copper look! Some lovely vintage white glass baubles help the box to stand up on its feet!
That’s it, my birthday gift for my man, Tim style! I really hope this will make him keep his things in place …even if he keeps all of it inside THIS box, it’s mission accomplished. What I have failed to do in 20 years hope the master will succeed!
 I am eagerly waiting to hear your comments on this box with a “hidden purpose”.
I would like to enter this in the following challenges…
Stamping Sensation- one for the guys
A Vintage Journey- anything Tim
Shopping Our Stash- counting on you
City Crafter Challenge -The key to the time
Art with heart Challenge- Go Green ( have up cycled a card board box, pages from an old atlas)
Simon Monday Challenge- B is for( box,blue, baubles, brad, button,bow and the Big boy!)
Until my next creative journey,
Happy crafting and re cycling.

Big hugs.


Sunday, 8 March 2015

GREEN with Envy!

Hello crafters..
Welcome to my page today. I have my DT project with Anything But A Card to share with you today. The theme this month is “Green with Envy”. It is up to you to interpret the theme but yes, we would love to see the color green in your project too. Absolutely anything that your heart fancies except a card! Now that’s the easiest part as you all by now know that I can’t save myself to make a card, lol!

I have altered a little glass jar which for this theme. A plain clear jar on which I first created a “faux Frosted” effect and then dabbed some alcohol inks in green, blue and silver. As you can see, green is dominant here.

My favorite color is green and that is one reason I love all nature inspired projects. This is going to be no different but yes, green is going to be the highlight here. Is there anything as too much green?? No way…right now my garden is bright green with a couple of showers that we had last week and I see some fresh leaves sprouting and a few flowers too. That’s my take on this challenge…but  what about the envy? Let’s wait for that part…

Once the bottle was done, I wanted to do some heat embossing  on the bottle directly which flopped big time! The embossing powder for some reason was not melting…I dint want to experiment, so I went ahead heat embossing the flowers and the quotes on tissue. I did the embossing in white so that it shows against the green.
I love these 2 quotes from Paper Artsy and it was just apt for this project. The lid too has some left over alcohol inks dabbed on it and then I made the mini terrace garden here!

Loooots of green foliage and a focal flower in the center. Just that one flower is enough to brighten that garden. I used Arianna blooms die to layer up this flower and mildly inked it with worn lipstick DI.
A garden is incomplete without some winged beauties and so came the butterfly and the bee!
The butterfly is a Itsy Bitsy die and I shaded it using DI and then dipped in UTEE. Whereas the bee is a stamp which has been colored too with DI and covered with rock candy crackle paint. Which looks better??? Maybe the butterfly is envying the bee for more than one reason now..one maybe it looks better and two, cos its first and up close to the flower, lol!
So you get that “envy” thing now???
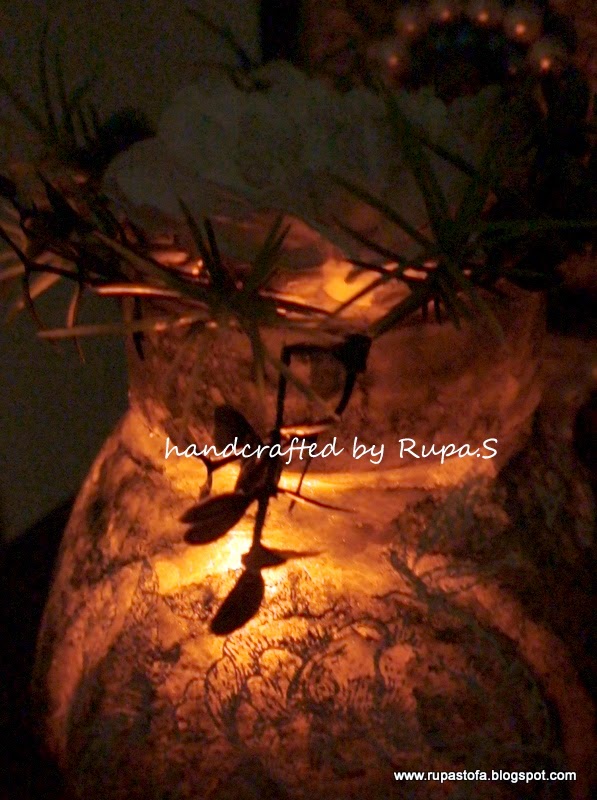
I couldn’t stop at that, and then lit a battery operated candle inside and was only surprised at the subtle beauty it radiated with the Buddha sitting next to it.

 I love this click... to me ,it was speaking a different language at that moment!
 The soft glow just grew brighter as the sun dipped.
Hope this inspires you to play along this month and do hop over to see what the teamies have created every week!
I would like to have my mini garden enter the following challenges.
GreatImpression – Go Green
ArtisticInspiration – AG with a twist of green
Crafts 4Eternity – Anything But A Card.
WowEmbossing – Spring (have done heat embossing in white and also UTEE)
Take It Make It Challenge- AG with stamping
All Sorts Challenge - Spring is in the air
Sweet Stampin Challenge - Green for St. Patrick's day
Until My next Creative Journey,
Happy Crafting and Re Cycling
Hugs.


Tuesday, 3 March 2015

Colors of India-GD project for TIOT

Hello crafters..
A warm welcome to all of you and a Big Thanks to my new followers.…am here today with my Guest Design project for Try It on Tuesday where the theme for this fortnight is “Pearls for Girls”…How exciting!
I was really excited when I was asked to guest design for TIOT, such a talented team out there and its honor to be featured amongst them for this challenge. Thanks TIOT team for this opportunity.
Now, coming to the challenge…Pearls look amazing in most of the projects and probably the simplest to accommodate as an embellishment in any project. I have tried to “show off” my pearls in a different way!
This time around, I have an altered project where I have up cycled a card board box which once housed a thermal flask. In the normal course, the packaging box would have found it’s way to the bin but having been bit by the re cycle bug, I decided to give it a new lease of life thru this challenge!
I needed a box to keep my collection of bangles and bracelets and so decided to make one out this!
Firstly, I made it operational horizontally against its normal position and secured it well by stapling all the edges. I then dished out this lovely pattern paper from Temple Tree. It’s a handmade paper, almost like fabric and has lovely paisley patterns all over it.
Have a look at the paper…so vibrant, so colorful, so ethnic and traditional, so INDIA…yes, the colors are inspired from the Indian flag this time.
I had a different plan for the lid! Once the box and the sided were done with the paisley paper, I inked the edges with peeled paint DI for dimension.
For the lid, I fist adhered rushed tissue paper with gel medium and created texture with TH burlap stencil. Once this was dry, I applied green acrylic paint and before it dried, I wiped off with a wet tissue. This removes some of the paint from the top layer to reveal the white beneath…distressed look with good old acrylics!
I then rubbed in Inka gold on the raised portions of the texture. It complements the paisley’s so well, you ought to see it live…
Now comes the time to show off my pearls. I made this brooch button for the closure with some full pearls and also the danglers from it with more tiny pearls. Fixed the brooch to the box with a brad and used elastic for the closure. My box looks pretty dressed up, lol!
For the embellishment on the top, I dint want too many colors,. I made lovely layered blooms using Heartfelt creations Arianna blooms and have a closer look at them…do they feel waxy???
 Yes, I dipped them all in a pot of bees wax and this time, I put a drop of musk oil to the wax…so you can imagine the fragrance from the flowers! I really hope you can smell themmm….oooooooooo
A lovely sentiment from Inkadinkado and some more pearls to line the box and the outside of the box is ready!
For the inside, I chose a complementing paper in green from Recollections pack and covered it,. I slid a empty kitchen roll to fit the width of the box …my bangles look pretty there, don’t they?
So, is that it…NO…you got to see the back ! What do you think would possible be there???


Ummmm..guess…
I fixed a foam panel in a matching tone to” show off “a few of my “special “ earrings too…now isn’t that a bonus!
Do you see the lovely gold bottle cap feet of my beautiful bangle box??? It proudly stands on my dressing table with all goodies inside and outside, lol!
I hope this inspires you to play along at TIOT and do let me know if you liked my “colors of India” box.
I would like to enter the following challenges with this house of bangles!
Re Cycle Re purpose Re Invent Challenge Blog- AG but re cycle
Glitter and Sparkle Challenge - AG
Eclectic Ellapu - AG
Our Creative Corner- Junk in your Trunk (old carboard box, bottle caps, empty kitchen roll)
Country View Challenge - AG
Frosted Designs - Handmade flowers and re cycled materials ( cardboard box, bottle caps, kitchen roll)
BGC- Mixed media
Thank you so much for stopping by,
Until my next creative journey,
Happy Crafting and Re cycling.

Cheers.