Tuesday, 14 June 2016

From The Heart!

Hello crafty friends..
Welcome to my page today. We have some lovely showers yesterday as I was working on my altered project. My project is as fresh and colorful as my garden outside with a little vintage twist!
Without much ado, here is my altered bottle...from the heart!
Each of my altered project is close to my heart ,lol...but this one just got the tag!
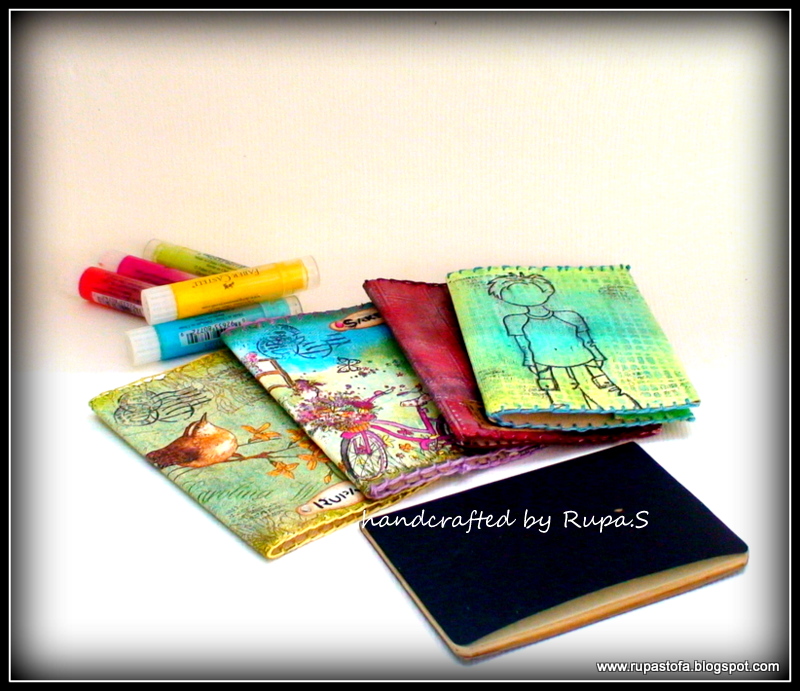
I had a blast with my mixed supplies  for this project
Step1- Once the bottle was cleaned up I sponged in gesso. I then adhered 2 decoupage tissues, one on each side and waiting for it to dry. As this was drying, i whipped up m y homemade texture paste and added some fine white sand to it to give more texture! 
Here is the outcome. I went about applying the same randomly on the bottle. The idea was to merge the tissue with the texture paste.
Step2- Lest the bottle to dry overnight with the texture paste...I know unlike me but my heat gun conked! I miss him sooo much, lol! Then came the acrylic colors. 
I sponged in a base light blue and then went over with a bright green. Next I made a spray with yellow paint and it was lovely to see it hit the nooks and crannies in the texture! Well this time I used my hair dryer to speed up things!
Step3- Once I was happy with the colors, I went about muting the brightness woth archival brown ink, potting soil! Yes, I love colorful with a vintage twist! The images too were speaking a vintage style and I had to tone down the brightness, lol! I loved how the brown ages the bottle!
Step4- The tag line had to be a special piece! So I went creating a faux weathered wood chip from a chipboard...yes, chipboard. I gessoed and layered colors and distressed them to reveal the age, lol! The stamp was just perfect to fit in there and some metal chain from my stash attached to it...a lovely distressed hanging sign was ready! Love it!
Step5- After a long time, I am actual working on floral embellishments! I made the pink rose with TH tattered florals die and made it the focal pint. On the bottle lid I created a little bed with twigs and coconut coir for the floral garden to rest! The pink rose is surrounded by tiny little flowers to match the flowers on the tissue!
 I got these little bugs and birds from a crafty friend and was more than happy to have them sit pretty here. The bugs ate all over...there is also a little one in conversation with the bird on the hanging sign!
There is so much life right now on this bottle...here is an aerial view of it.
It doesn’t look bad on the other side too, lol!
I just love this little girl...there is something about here wanting to say something “from the heart”! The girl and the pretty cycle make a pretty companion with the lovely outdoor feeling of the birds, bugs, flowers and the vintage garden...what say???
I would love to hear your views on this. It always makes me happy.
I wish to enter this vintage garden in the following challenges...
A Vintage Journey- texture paste
Anything but Cute- Birds and bees
Lessology- neon colors
Frilly and Funkie – Let the words do the talking

Until my next creative journey,
Happy Crafting and recycling.
Cheers.


Thursday, 9 June 2016

My Love for Mangoes!

Hello crafty friends..
Welcome to my page today. I am still enjoying the lovely weather from my studio and  its been a pleasure working with the sun up during the day and evening showers just cooling it off!
So, I have a very cool altered project for today. If you are a mango lover, you will recognize this little fella that I am going to alter!
 Yes, it’s a mini wooden crate...I got it long, long ago, so long ago, god knows how long ago...BUT even then, I did not throw that crate away, lol! I knew it had a future and so yes...I remember it must be more than 13 yrs back that I received a mango sample in this and I am NOT a mango lover but definitely the packaging caught my eye!
So let’s start....
Step1- It was a very simple crate with some ordinary packaging wood but then it was sturdy; yes...it stayed up my attic for so many years, lol! I don’t remember, but looks like I had I had done some texture work with a ceramic cone on it and left it at that. So to cover up that, I painted the whole crate with gesso but the texture was still seen and I was not happy. I knew another coat was not going to make it any better and I dint have the patience to sand down the whole thing.
So I thought and finally decided to stick strips of paper from a magazine. Just plain white and black print and I decoupaged it all around with modge podge. I then inked the edges with lavender acrylic paint and gave a coat of varnish and let it dry.
Step2- This lovely floral napkin caught my eye and I thought was perfect for this project. I went about cutting 2 ovals from an old wedding invite, a thick one mind you. I then gave a coat of lavender acrylic paint and once that was dry, gave a coat of crackle medium, an Indian brand which was in my stash. Sadly, it is no longer manufactured! I love not so big cracks that I can achieve with this.
I tried applying it in 2 different directions on the base and when it was tacky, gave a top coat of white acrylic paint. Voila...the lovely cracks appear and I get to see the lavender color beneath. This is such a beauty and I managed them in different directions too!
Step3- I tore the napkin to fit the oval panel and stuck them using modge podge. I liked the fact that the cracks can still be seen through the napkin...a crafters delight! You agree??? I then worked on the edges with acrylic paint and then sealed the panel with Deco art Triple glaze. It took time to dry but I liked the final look.
Step4- I then fixed the panel to both the front and back of the crate and embellished them with tiny lavender pearls. 
A small tag with “hello” stamped and tied with the same lavender paper twine gives warm touch to the crate. A bunch of white roses when placed inside, gives life to the entire project!

I JUST LOVE IT! This is probably the simplest project that I have done till date, just 2 tones and nothing too fancy...a CAS altered project, lol and NOT Vintage!
Here is the back view...as good as the front, lol!
Let me know what you think.
 I wish to say “hello” to following challenges with this...
Simon Monday Challenge- Summer garden
Country View Challenges- Crackle (love them)
Alphabet ch- G for girlie
Eclectic Ellapu- mid summer
All sorts Ch- Great outdoors
The Crazy ch- Bingo(twine, pearls, flowers)
More mixed Media- Ag with the optional twist of purple
Until my next Creative journey,
Happy crafting and recycling.

Cheers.


Monday, 6 June 2016

Flowers and Hope !

Hello crafty friends..
Welcome to my page today. I am here after a long holiday and waiting for the creative mojo to strike me!
Its been raining a  bit here and my garden which overlooks the studio looks fresh and green with flowers blooming and smiling! It’s as if they are happy after a nature wash and that made me work on a flowery colorful project this time!
However I had to re cycle something and this time I dint spare this sturdy liquor carton! I thought to myself” If it can keep a fragile and delicate bottle inside safely, so can it take my creative abuse and mess, lol””...what say...
I went about cutting and altering the shape and opening of the box and then coated the entire box with gesso. I was ready to get all messy!
Step1- I took out my stash of decoupage napkins and decided on a nice floral one and then swished out my gelatos. I took blue, green and bright yellow and then went about scribbling on the body and then blending with a dry tissue. It gave a mild background for me to decoupage.
Step2- The front panel had the tissue decoupaged with modge podge. Next added some brink stencil and acrylic colors and then I went about stamping my fav script stamp with archival black at random places.
 I then made some tiny circles with a pen cap and gesso and finally color splats in black and white. I made sure the white drops were really tiny and used a bigger brush for the black color.
Step3- Once I was happy with the mess, I covered the edge of the lid(where I had cut) with matching washi tape, fortunately I had it! This helps cover the rough edge and then I proceeded with the lid cover.
Step4- The lid cover is interestingly like a slope and with the bricks and flowers around, I could only think of a roof! Stuck some raffia and then punched holes in the box and the lid and enclosed it with a paper chord in a nice green color! I colored the inside of the roof with dark brown acrylic, just in case....
Step5- I covered the exposed part of the box and the inside with wood grain paper from our very own Indian brand, Papericious. Isn’t it lovely! Love the blue and brown grains! I then embellished the roof top with some flowers and metal charms and die cut leaves. 
The bright colored flowers complimented the lovely floral design on the box and i decided to stop here with my mess. Covered the box edge with metal corners and voila...my housy, flowery, colorful multi purpose box was ready!
But wait, something is missing...I wanted the flowers to send across a message and so got this lovely quote from the net and stamped it using my new alphabet stamp! I just love the quote...there is definitely HOPE in the air...that’s what keeps us going!
I also stamped”with love” at the back! Now this box is no comparison to its original and am glad it withstood my messy creative work.
If you did like what I have done here, let me know! Thank you so much for stopping by and “Keep the Hope”.
Until my next creative journey,
Happy crafting and recycling,
Cheers.
With this hope, I would like to carry this to the following challenges...
Our Creative Corner- Beautiful mess
Frilly and Funkie- let the words do the talking
Stamps and Stencils- Flower frenzy
STAMPlorations- June mixed media challenge


Wednesday, 1 June 2016

Serve in Style!

Hello crafty friends..
Welcome to my page today. I am here after a long holiday and waiting for the creative mojo to strike me!
Sharing my project for Rhedd’s Creative Spirit this month where it is always “anything goes” altered art or mixed media, NO CARDS.
I made some coasters and place mats using cotton rope and wanted to share the process with you. It turned out to be so good, I decided to gift it too!
Step1- I got these thick cotton chords from the local hardware stores which looks like rope! I rolled it into a spiral using the hot glue gun to the desired size, just enough to hold a cup and one big one for a place mat.
Step 2- Once all of them were ready, I gave a light wash of gesso to all the mats and as that was drying decided to choose some lovely prints from my stash of decoupage napkins. I must say I have been collecting quite a bit now!
Step3- I tore around the designs and adhered them to the coasters and mat using decoupage glue. What I liked was that the tissue settled down so beautifully on the grooves of the spiral and the rope texture through the design made it even more pretty!
Step4- A few dabs of acrylic colors in coordinating colors and then 2 coats of varnish and my coasters were ready. Actually I decided to give another coat of varnish so that these pretties withstand the heat and daily wear and tear,lol!
Right now they are sitting pretty in their new home waiting to be served. Hope they catch the guests attention!

I managed to give each of them a small loop so that when they are not in use, they can add some color and interest to the kitchen by hanging off the shelf!


Do let me know what you think of this project, pretty easy one right and ofcourse don’t forget to drop by our blog to see what the team has in store for you and do play along.
Until my next creative journey,
Happy crafting and re cycling.

Cheers.


Sunday, 1 May 2016

Where is the monk?

Hello crafty friends..
Welcome to my page today. Sharing my project for Rhedd’s Creative Spirit this month where it is always “anything goes” altered art or mixed media, NO CARDS.

I have altered an old monk bottle, empty of course, lol! Love this one as it already has some crackled texture on it and I just wanted to highlight those.

I first cleaned the bottle and gave it 2 coats of black chalkboard paint.
The central portion where I wanted the picture, I applied gesso and stuck this African lady(tissue) with Deco art decoupage glue.
Once that was done, I went about playing with metallic lustres from Deco art....
Just rubbed them with my finger and loved how it took to the black textured surface!
The cracks all got highlighted and the lady just looked awesome with that background!
I wanted to finish off this boho chic look with some colored chord and wooden beads around the neck of the bottle.

Some greenery in it and the MONK was beyond recognizable, what say???
Hope to see you play along this month and do visit to see what the team has in store for you.
I am off on a holiday for a month and see you at the other end.
Ta ta...
Until my next creative journey,
Happy Crafting and recycling,
Cheers.


Friday, 15 April 2016

Passport sleeves and a tutorial

Hello crafty friends,
Welcome to my page today.
I am here with a mid month tutorial at Rhedd's Creative Spirit on the colorful passport sleeves that I had posted beginning of the month.


Not 1 or 2 but 3 different styles with things available in your stash!
So what are you waiting for???
Head over to Rhedd's and make one for yourself and

flaunt your style and do let me know which one you liked.
Am waiting....
Until my next creative journey,
happy crafting and recycling.
Cheers.

Saturday, 9 April 2016

Girls wanna have fun!

Hello crafty friends..
Welcome to my page today. Its getting warmer by the day here but I had great joy in doing this project as always... its a trash to treasure one, (do I know anything else at all!!!).
Off late I have been doing a lot of masculine project and so this time decided to pamper myself! Its vacation time here and I plan to travel soon and isn’t that a time to flaunt too...and so I made myself a little suitcase to carry all those “strictly womanly stuff”...you will see in the end, lol!
This time I looked around my store room and spotted this DIY craft packaging box, quite sturdy and ready to take on what I had in mind and so it reached my craft table along with an old Mills and Boon!
And after some time became this.....
Here is how it went...
Step1- It was a vertical closure box and I had to play around a bit and make if a horizontal one with the flap opening like a suitcase. Once that was done, I gave a generous quote of gesso and planed my next course of action. 
I had this lovely vintage wrapping paper in soft pastel shades which I thought would be perfect. I wanted something subtle and not too flashy! I inked the paper with tea dye and painted the box with chalky finish
Step 2- I cut out the wrapping paper with the images of the bird, lovely blooms and the vintage gramophone and a perfume bottle...It felt like a dream already!
Once that was decoupaged, I worked with my new stencil from Deco art and my homemade texture paste. The stenciled flowers start from where the decoupage ends and I carried it to the sides of the box too. Once that dried, I spritzed some walnut stain DS and dried it with a heat gun. It found the crevices easily and added a lovely vintage look to the box.
Step 3- I fixed the metal closures for the box and worked on the handle. I ran a thick CS thru an embossing folder and then gessoed and painted and it and then gave a few coats of varnish to make it sturdy like leather and then rubbed it with de co art metallic lustre in fushia and gold! Fixed it with a brad and lo!  Some metal charms..a pair of heels, a comb and wings...and I was ready to fly with this!
Step 4- As part of embellishments, I made the corner strips for the box using CS and did the faux leather technique in dull grey colors and attached it to the box with some faux stitching too! The top of the box is an altered key using TH alterations die and I aged it up with crackle paste and DS, fixed a metal flower and then a shabby resin rose and some 2 toned paper twine along with a pearl, phew! The label says it all and that gave me the mojo to work on the inside!
So let’s open the Pandora’s box!
Here we go....
Step5- The inside lid is lined with pages from an old Mills and boon and I altered a little envelope...got my new credit card, lol...more shopping! I covered the envelope with the same wrapping paper and covered the flap with a doily and attached it to the box. 
This can hold my secret bills! A lace flower sprit zed with milled lavender and a velcro closure seals it. One more label for the lady and  a few tiny wooden pegs on the lid to hold some paper slips and girlie pics...just made me smile actually!
Step6- The inside of the box was lined with wrapping paper too and inked it with tea dye DI. The crochet lace on the rim just added to the womanly factor and I placed a text doily in the center and sealed the base with an sheet so that it doesn’t get soiled inside. The edges of the entire box were rubbed with metallic lustre gold and some fuchsia here and there.
That’s the pretty suitcase all set to be loaded...let’s see the “strictly womanly stuff” ,lol!
There you go...one more time...
There is room for all of this and more!
Ta ta...My new companion for the vacation! I will see you soon.
I wish to enter this suitcase in the following challenges...

Stamps and Stencils- Trash to Treasure (you bet, my new buddy now!)
A Vintage Journey- Spring is in the air ( with all the pastel shaded and the flowers all around! )
Things to alter – Ag,Add a bird ( can you hear it sing near the gramaphone,l ol)
Craft Stampers magazine – Spring flowers ( loads of them)
Lessology- snail mail revolution( gosh, if not for that credit card! )

Thank you so much for stopping by and
Until my next creative journey,
Happy crafting and recycling,
Cheers.
Deco Art products used-
Deco art decoupage glue
Chalky finish paint- Vintage
Deco art matte varnish
Deco Art metallic lustre- Radiant red and fab Fuchsia

Deco art stencil- re usable stick on stencil, Arabian tile