Tuesday 31 December 2013

"New" for the table

Hello crafters...
My last post for this year.
Last month I had made a layout for my husband "Good Times" to celebrate his promotion. It was also to do up his new cabin which he shifted to rescently.

Keeping the same theme in mind, which also happens to be my fav colors for "men"...Red, Black and Khaki,I made this easel card with post it and the yearly calendar.


I don't know about other men, but my dear husband will easily forget the gifts he gets,if he doesn't get to use them on a daily basis!
I thought this calendar cum post it holder will make him glance at my efforts on his table atleast once a day! What say...
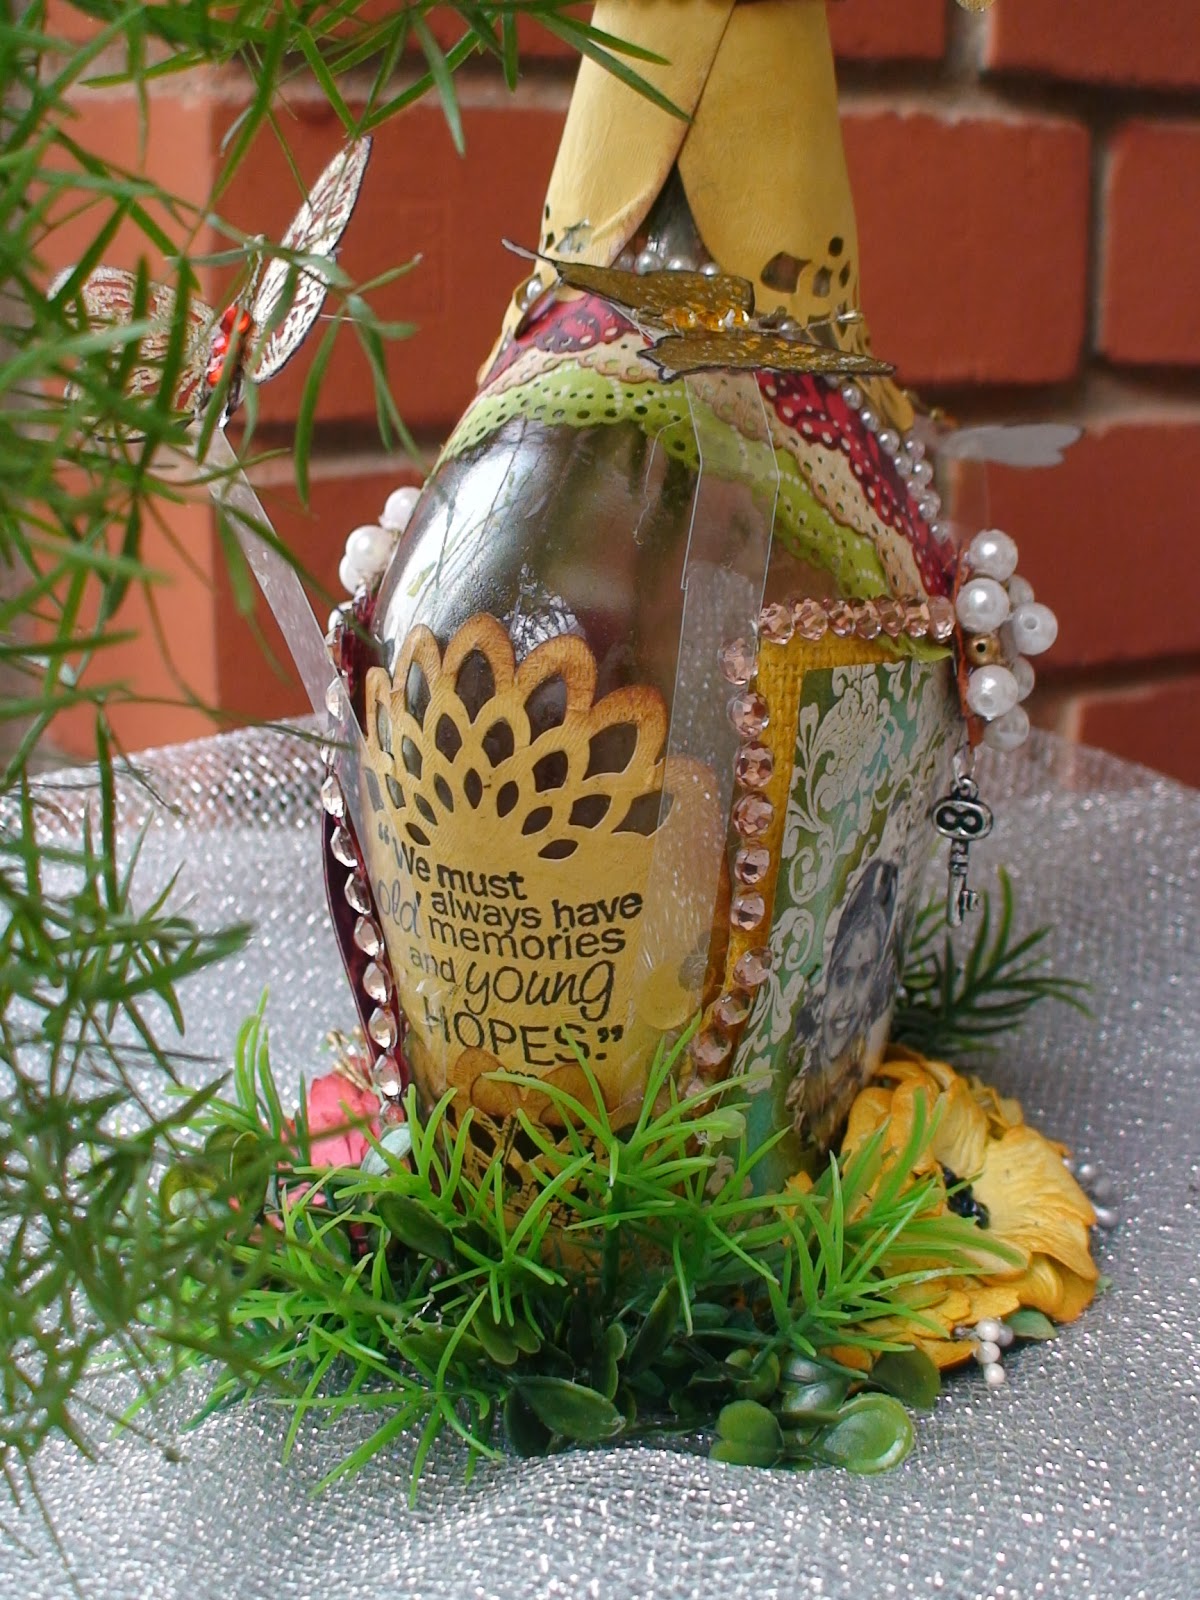
I love vintage theme too...so went ahead and used the Tim Holtz stamps and the weather clock for the focal point. The Wishes & Dreams quotes were just perfect to go with the Tim Holtz sentiment...all of them very motivating and inspiring to see everyday on your work station.
Added a few button as embellies for the "sewing man" !!!


When I alter or work on any 3Dproject, I hate to ignore the back side of it! I thought why not the person siting on the other side of the table too have some visual delight....so here's the back of the card!
Hope you can see the coconut shell button!

Surprisingly, a lot of thought process went intomaking this masculine card, but I enjoyed every bit of it and would love to see it on his table and more importantly to get a feed back from his collegues !!! Do you think they will even notice these things at work and even appreciate...I need to wait on that !!

But, you guys please let me know what you think of this project.
Wishing all of you a VERY HAPPY NEW YEAR.
Linking this to...
http://avenue613.blogspot.in/2013/12/last-challenge-of-2013-challenge-52.html
http://theshabbytearoom.blogspot.in/2013/12/week-199-color-challenge.html
http://thepinkelephantchallenge.blogspot.in/2013/12/the-pink-elephant-challenge-tpe231_30.html
http://lulupu.blogspot.in/2013/12/lulupu-challenge22-cook-it-up-blog-hop.html
(have used stamped image, die cuts, embellishments, PP)
Until then,
Happy crafting and re cycling,
Hugs.


The card when closed...

Sunday 29 December 2013

" No Words"....Special layout.


Year endings are in a way nice, bcos it gives you a moment to think back all that you did through the year and gives you an opportunity to “Thank” all those people who made a difference in your life.

This is one special project, a layout that I made for my son’s teacher (Shopana) …What is so special about it???


She has made a huge difference in his life...Shreyes is 14 yrs old, a child with special needs and has been going to this school for the last 5 yrs now. This young lady has been his tutor and my friend for the last 3 yrs and has incorporated a lot of new techniques to teach him. It is a joy to watch the 2 of them together and  I particularly love the “home sessions” where I actually get to see him perform!

I thought this is the right time to “gift” her and to express our thanks for whatever she has done for  him.

The LO is a cheerful one with lovely bright colors just like her!  I gessoed and painted the circle cutout in yellow and placed it on  white chipboard. I decorated the corners using the “bandana Technique”. This is a beautiful stamping technique with bright colors, where you stamp a bold pattern and then start highlighting it with white dots and lines! I have used the Blae and Ivy stamp here.


Once the corners were done, I placed a favourite photo of me and Shreyes on a mat and slid it thru the slot on the LO. I had this stamp with the perfect sentiment and wanted that to be the focus of the LO. The handmade blooms are using Tattered florals and Cheery Lynn daisy(B310). The embellishments  were complete with a few flourishes, cheery Lynn olive branches,


a thank you note and some lovely pearls all around the circle border.


I got very emotional when I gave this to her…and actually had no words to say to her. She has done sooo much for us and this gesture was to just let her know that we reciprocate  and truly appreciate each and every initiative that she takes with Shreyes.

“THANK YOU SHOPANA” from my heart….

I hope you liked this LO and let me know your feedback on the “bandana technique”. Do try it…its quite simple but the effect is dramatic, ornate and decorative!

Thanks so much for stopping by…see you all the coming year with more interesting projects. My New Year wishes to all of you.

Until then,

Happy Crafting and Re cycling.

Hugs.

Tuesday 24 December 2013

Altered box

 Hello crafters,
Am really excited sharing this post with you cos I dint expect that this project would come out this beautifully!
 I had this glassware box with compartments,  and was wondering what to do with it and voila I took some empty tissue rolls too and this is what I came up with!

Oh I have soooo many bangles just lying around without proper storage and this is is going to make organising them easier. This gift is for me!!!
I painted the whole box with black acrylic paint and then  used the PP from Recollections(fashionably chic) paper pack and stuck all the sides.
Since it was going to be a bangle box, wanted to create an ornate look and so I tried using the aluminium foil technique to give the faux metal looks on the corners of the box, the base of the handle and the front lock.
A few Cheery Lynn Daisy blooms(B310),olive branches,flourishes and some cute sentiments on  the lid completed the look.  I also altered an old key(to match the color scheme) and stuck on the lid. The white lace trim gives the feminine touch to it and within a couple of hours, I managed to get the look I wanted.

 When you open the box, there is ample space for storing bangles and now my dressing table will have this lovely box sitting on it and I shall have the pleasure of seeing this everyday!
 Pl do let me know your feedback on this and am sure you can do one for yourself too!
Am linking this too...
http://cheerylynndesigns.blogspot.in/2013/12/cheery-lynn-designs-challenge-112.html
http://beyondgrey.blogspot.in/2013/12/bgc-44-3d-gift-challenge.html
http://lulupu.blogspot.in/2013/12/lulupu-challenge22-cook-it-up-blog-hop.html
I have used PP, sprays, die cuts and embellishments.
http://alteredeclectics.blogspot.in/2013/11/november-until-february-2014-anything.html
http://avenue613.blogspot.in/2013/12/challenge-51-anything-goes-no-twist.html
http://anythingbutacard.blogspot.in/2013/12/in-spotlight-and-mini-challenge-with.html
 Wishing all of you a meery christmas.
As always, happy crafting and recycling...
hugs.


A closer look at the altered key...

The sprayed and crackelled handle and the faux metal base for the handle...
 
 The faux metal flap on the lid, below which are the Velcro fasteners...
 Ample storage for bangles....

Tuesday 17 December 2013

2 sided "love"

Hello Crafters....had been missing from action for the last 2 weeks due to some personal reasons and am back to routine.
This time I have a recycled altered photo frame. There is a small revelation at the end as to what has been recycled! If you are impatient just scroll down,else continue to enjoy reading!
All of us have mood swings and have different emotions to express...and so our vision of love too can be different, what say?
This photo frame has 2 sides, one side depicts the young, shabby chic kind of love and the other side reveals a mature, vintage kinda love! Howzzzat....

 Both patterns papers are from K&Co and for the shabby chic love, I have done some texture work with modeling paste and rose stencil. The little pink blooms are handmade and the heart slot for the photo is embellished with mauve pearls.

The blooms along with some flourish die cuts sit on a musical note stamped BG as if some romantic song is playing in the background and the silver net bow with the handmade pearl brad and the silver bells add a festive feel to this "Shabby chic Romance"! Some lace and a base with the sentiment stamped, completes this side of the frame.

Now for the next look....

The vintage side has some script stamped on the bg and have used black CC for the weathered clock.


The shaded red rose too id Tim Holtz and has some script stamped on the petals. The rose along with a feather and some weathered leaves adds a vintage feel to this side and the bling at the base gives it a royal feel! The small tag with some antique gold bells and the sentiment gives it the much required vintage feel to this romance!

This lovely frame is going out to my friend who owns a local stationery store, who has always supported my re cycling work and loves my creations too.
And now for the small revelation on the recycled item...have a look!
Am linking this project to....
http://beyondgrey.blogspot.in/2013/12/bgc-44-3d-gift-challenge.html
http://citycrafter.blogspot.in/2013/12/city-crafter-challenge-blog-week-190.html
http://anythingbutacard.blogspot.in/2013/12/all-is-merry-and-bright-for-week-3-of.html
http://lulupu.blogspot.in/2013/12/lulupu-challenge22-cook-it-up-blog-hop.html
http://theribbonreelchallenge.blogspot.in/2013/12/challenge-66-shabby-christmas.html
Thank you soo much for stopping by and do let me know your view on the "2 sided love". So whats your "mood" today?
Happy Crafting and Re cycling,
Hugs.


Sunday 24 November 2013

For Good Times...

My husband got promoted few months back and with that came a nice big cabin and I was more than happy bcos I knew I could do something for him there!
It is a beautiful cabin overlooking the busy main road in Koramangala, and one side of the cabin has a nice glass wall to capture this view. It lacked the greenery and some cheer and so I decided to make a layout for his cabin, and with great enthu asked him "What is it that you would like to see in your cabin everyday?" And pat came the answer.."Some colors, flowers and my daugher!"   Ok,Ok...I know me and my son got left out in this deal, but who is complaining,my creative brain was already at work!

And so began this LO, "Good Times"...I din't want it to be a mere decor element and so decided to have a clock element which will make him see the LO atleast once a day!


My husband belongs to the garment industry, and I found the perfect PP from the stack8 of We R Memory Makers..This was a big LO, 16 X16 and so I attaced co ordinating PP in checks,stripes and dots and stuck to a neutral color theme which will compliment a 4yr old and a 45 yr old!
I wanted textures too as it was for "his" cabin and so the 2 photo slots had different texture work and all the blooms are with corrugated cardboard!

So for the "sewing man", i hand sewed the different PP together with embroidery thread and used a lot of foam bottons for embelishments. There is also e nice white lace tucked under the PP on one side!

The Tim Holtz weathered clock was a perfect match to this LO denoting good times, and I heat embossed it in gold with a sentiment in the center. I am hooked to heat embossing these days and so i did a few butterflies too and also the heading for the LO has a lovely pattern embossed on it.


Now let the pictures do the talking..I hope to frame it soon and hand over to him next week. Hoping for good times in his work life and to all of you. Do leave your comments about this LO....

 The lovely PP with the dress form in ine corner duely embelished and you can see the how tha PP's have been hand sewed!


 The measuring tape and the lace tucked beneath on thePP and some foam buttons and florishes take care of this corner!
 Thanks a lot for stopping by...
Am linking this project to...

http://lulupu.blogspot.in/2013/11/challenge-21-magical-memories.html
http://catchychallenges.blogspot.in/2013/11/keep-calm-and-go-girly-challenge.html
http://avenue613.blogspot.in/2013/11/challenge-47-anything-goes-optional.html
Until then,
Happy crafting and re cycling!
Cheers to "Good Times"

Wednesday 20 November 2013

Canned terrace Garden!

Nature inspired projects are soo colorful especially if its a garden theme...it's a crafters delight!
Well,this project is inspired from one of the blooming spots in my 1st floor balcony garden.I have box planters on the sun shade there and blooms just spill out of it...it's a visual feast.

I have always wanted to have a terrace garden and may be will have one in the futute but until then, I have derived some creative satisfaction by altering this can into a "terrace garden" !!!

 Since, this was going to be christmas gift to a friend, i wrapped the can in some xmas themed red PP and drawing color inspiration from the current Itsy Bitsy challenge,have stuck to reds, pinks,whites and greens. Instead od the tall lamps, i decided to have a Led tea light as the focal point on the garden.There is a small surprise element in the end too...

The lid became the base for the terrace garden, and with the tealight as center point,I worked the hanging garden!The lush foliage was stuck and then the blooms are made with cheery lynn die and suspended from acetate sheeets to looksas if they are spilling off the terrace! The butterflies too give the feeling of being in mid air.

The body of the can has a nice white lace going around in the bottom with bling on it. The sentiment is mounted on a frame which is subtly heat embossed in silver and a small bouquet arrangement of handmade blooms and flourishes and a cute l'le butterfly completes the decor.


And now for the surprise element....What's a garden without a windchime and for that, when you open the lid...ooo la la ,there a few silver bells hanging which jingles happily!
I plan to have some homemade goodies inside the can and give it to a friend, though I think more than storage, this altered can serves as a decor piece or a romantic setup on the dining table for a candle light dinner...what say????

Thank you soo much for stopping by and would love to hear your comments on this " romantic terrace garden"
Am linking this to...
http://beyondgrey.blogspot.in/2013/11/bgc43-create-shaped-projects-with.html
http://itsybitsyindia.blogspot.in/2013/11/the-itsy-bitsy-picture-inspiration.html

http://lejdesignschallengeblog.blogspot.in/2013/11/lej-designs-challenge-no-80-alter-it-or.html

Happy crafting and re cycling.
Cheers.


Monday 18 November 2013

Wedding wows in a garden!

This project is a creative extravaganza....one thing led to another and as i finished this project, I was soo happy that it turned out to be much better then i visualised it to be!
By now those who are following my blog would know that I love to alter things around at home or I am more that happy to upcycle some scrap lying around....
Well, this project is no exception! I had in my mind that this week i wanted to alter a bottle and the current garden theme at BGC...set me thinking! I love sipping my morning cuppa in my garden and there is no derth of plants in my house as GREEN is my fav color!!!
http://beyondgrey.blogspot.in/2013/11/bgc43-create-shaped-projects-with.html
Then.. came the Lulupu challenge of having a picture as focus, and this gave me anotther idea...
http://lulupu.blogspot.in/2013/11/challenge-21-magical-memories.html
And finally,the Itsy Bitsy picture inspiration kind of nailed the picture for me! I was so clear i wanted a wedding pic to be the focus!
http://itsybitsyindia.blogspot.in/2013/11/the-itsy-bitsy-picture-inspiration.html
And so was born this "wedding wows in a garden".....
I don't know how many of you have attended a typical south indian Tamil Brahmin wedding...we have a ceremony called "Oonjal" (swing). The bride and bridegroom sit on a swing which is very elaborately decorated with flowers and the grandeur of the wedding ceremony makes it a very memorable event .
I have taken the photos of that ceremony as the focal point and worked around that theme. This ceremony literally gives the feeling of sitting in Brindavan(garden) as the rituals take place.
So go ahead and feast your eyes with a picture heavy post...Hope you all like it. I enjoyed every bit of it as I was reliving the moments of my wedding day....
I plan to give this to my parents for their coming wedding anniversary.
Would love to hear your comments on this...
Thanks for stopping by.
Cheers,
Unti then...
Happy crafting and recycling.

One side of the altered bottle with the"oonjal" picture of my parents way back in 1971!

The other side with my "oonjal" pic...1995!

The side of the bottle with foliage,suspended butterflies,heat embossed in gold, the deep edge punched border with the sentiment!

The other side of the bottle with yet another perfect sentiment and the butterflies hovering around!

What a lovely pic of my parents..hope I've donee justice to this with silver embossed frame and have used broken china nd peeled paint for distressing. The handmade pearl button has a key charm hanging and the blooms are hand made too!I have used the Martha Stewart lace punch to decorate the neck of the bottle like a necklace with the handmade button as the pendant!

Ahhh that day...still so fresh,the fragrance of flowers all around! This pic from my wedding album is my favourite for the colorful backdrop it has...tried to re create that with some deep pink handmade blooms, gold embossed frame,distressed with worh lipstick and fired brick.The peral button here has a heart charm dangling! The bling around the pic frame just adds to the grandeur!

Hope you all enjoyed the wedding tour!
Love...


Thursday 14 November 2013

"cherish" altered box

I am back with my favourite altered project with the color theme too that i love...the fall or autumn colors! Love the look with browns, oranges, olive greens and yellows...
This box, I have altered for a friend who has supported my "art from scraps" initiative and has fondly collected a lot of scrap for me! This is one such plain red cardboard box which i decided to give a makeover...

I have used the PP from Recollections and distressed the edges with wild honey. The polks dotted paper goes so well with the brown dmask print and lends a very soft elegant look to the box.
The oval frame is a negative given to me by my crafting friend and I have heat embossed the edges in gold and heavily inked it too! The inside layer of olive green paper too has been run thru a dotted embossing folder from Itsy Bitsy. The sentiment is haet embossed in black.

The blooms on the top of the box are handmade using Cheery Lynn Shasta Daisy with glitter bead centers and inked too.The blooms,the fall leaves and a few feathers complete the top.

The front of the box has cute blooms using Cheery Lynn  again,Small Heart Cutie Fringe...love the way the hearts "pop" out of the flower and also olive branches in brown!

The sentiment is heat embossed and the pearl button is hand made too! I have added a few pearl strips on the lid too.The Tim Holtz Leaves have all been spritzed with ink, crushed and dried and inked again to get the "fall Look".
The inside of the box to has panels of PP from Recollections and the edges are inked with wild honey.
So how do you "cherish" my "fall box" ???

Would love to hear your comments...
Thanks for stopping by.
Until then, happy crafting and re-cycling!
Cheers.
Am linking this project to...
http://cheerylynndesigns.blogspot.in/2013/11/cheery-lynn-designs-challenge-106.html
http://citycrafter.blogspot.in/2013/11/city-crafter-challenge-blog-week-185.html
http://asyoulikeitchallenge.blogspot.in/2013/11/challenge-15-whats-your-favourite-spots.html
http://anythingbutacard.blogspot.in/2013/11/enjoying-colours-of-changing-leaves-for.html