Tuesday, 20 January 2015

Too Early for LOVE???

Hello crafters..
Welcome to my page today…I have a ”New Technique” to share with you and am really excited about it  …well, when am I not???
Before that, I would like to thank you all for the lovely comments you all left on my altered Iron! That was so encouraging. So after a creative exhaust I thought I will try a new technique which I accidentally hit upon on You Tube!
It may a little too early for valentine projects, but somehow I thought a bold, romantic theme would suit this “Faux Leather Technique” that I am totally addicted to. I tried one and then the second and then ended up doing 6 projects with this technique!!

I am going to share 2 with you today…thank your stars for that now, Lol!
I have always loved vintage stuff and faux leather looks good on Kraft Card stock and I was more than happy to cut my CS to small pieces to suit my project.

I had a lot of coffee stained papers from my earlier project, another addiction and thought I needed to do something to preserve this beautiful papers and give them a grand cover…and so I made “faux leather junk journal” !

It is amazing how the Kraft CS takes a good amount of “treatment” to look like leather. sprit zing with water and glycerin about 3 times, squeezing and scrunching to break the fibers, drying it and then running it thru en embossing folder!
Yes, once the wet CS is out of the folder, it has to be dried and then starts the layers and layers of inking! I have experimented with different colors of DI and for this I have tried Fired brick and black soot (valentine, you see) !
For the journal cover, I used a damask embossing folder and once I achieved the desired color, I sealed it with 2 layers of spray varnish. This is what finally gives it the shine and sheen of leather! It is unbelievable how after the entire process, a crisp Kraft CS becomes so flexible and pliable like leather and most importantly, tough!
Do you see a faint image of a vintage romantic couple on the cover???I experimented with printing on tissue paper at home! Another new technique that I learnt!

For the closure, I have used some stretch lace and used Velcro to fasten it. To cover the joint, I made a romantic badge! I have Paper Artsy mini stamps here. Stamped it on CS, colored it and sealed it with 3 coating of Clear UTEE. Pierce a hole and have a little hearty cherub in metal hanging! LOVE….
I have stitched the coffee stained signature to the cover and have attached a beaded dangle with some glass beads and baubles and hold it…a lovely metal cupid charm, all of this hanging from the spine!
The extra twine that hangs after stitching, I brought it to the book center and have looped a small book mark to it!  This time it’s a die cut with the same PP and layers of UTEE…a glitter heart!

You have to touch the faux leather to believe it! I will be back a tutorial on this soon. Bless your souls for a short post from me! Lol…
Next I did a romantic mini using a single piece of 12 X 12 PP from DCWV ,French  Country stack and did a cover for it using the same technique but using another embossing folder.
 I reversed the colors this time, black being more dominant, then red and finally rubbed on some  Inka Gold with my fingers and then sealing it. 
This mini can hold up to 15 pics and also has pockets, tags and inserts.
For the closure here, I have used some silk threads in black and red and the spine here too has some glass baubles and a metal charm..a love letter in an envelope! How romantic is that???

To make it even more romantic, I took this cute Pooh quote from 613 Avenue Create and have made it the focal point in the album cover.
I thought I will make a set for the “romantic hearts” and so the coffee journal and the mini. I think they make a cute pair, what say?

Would love to hear your feedback on this and for those of you who want see my addiction with this technique here are the other 4 journals in different colors.
Have a good look and tell me which color looks the best. I am really looking forward to hearing from you on this.
I would like to enter this twin project in the following challenges…
DreamValley Challenges – Anything Goes
LTSCB – Anything Goes
Loves toCreate Challenge Challenge – Color inspired ( red, browns and black)
Craft Yourpassion – Anything Goes
That CraftPlace – Love / Valentine
613 AvenueCreate – Anything Goes with the option of Winnie quote
CraftingMusketeers- Valentine
WinterWonderland- show us your metal
FrostedDesigns – A New… technique( have tried 2)

Until my next creative journey,
Happy Crafting and Re cycling.

Big hugs.

Wednesday, 14 January 2015

You are invited!

Hello crafters..
A warm welcome to all of and a happy new year for those of you have joined me recently.
Am here to share with you an altered project that I have been challenging myself to do for the past 6 mns! Yes, the hidden element here is just something you cannot imagine can be re cycled! It was one of the first things that I bought when I set up my home after marriage..about 19yrs ago! It has seen many good days and lately has become defunct and I really dint want to throw it…blame it on the recycle bug...but it was a bit of a challenge to me itself as to how I could alter it. I am NOT going to reveal so early…you got to wait for that , dearies!
Here is how it looks after the alteration…I doubt you can guess it.
 
Let’s start with beautiful cottage, the lovely over hanging on the roof…looks like it needs some cutting! But I love it…the roses hanging from the lush creepers. The flowers are all made using TH tatterd florals.

The front arch door is made with faux weathered white wood panels! How cool is that! I dry brushed black and white acrylic colors on white CS and then ran it thru a wood grain embossing folder and then cut it into strips, inked the edges and then built the door. Phew! That was some work, but I knew I wanted only this door for the house! Just look at those textures…
I cut out the window using IO dies and have heat embossed the pane in with WOW white embossing powder. The hardware hinges are cut from canvas cloth (for flexibility) using TH die and is also heat embossed in white. The metal pull out has been painted white and distressed to give the worn metal look and held to gether with silver brads.

I wanted some warm and inviting quotes on the door and so again heat embossed the sentiments on black CS and mounted them on my faux wooden plank too!
You are now cordially invited to view the inside and all around the house!
Are you still keeping your eyes open for the hidden element??? Keep guessing…
A look at the house shaped accordion album which can be taken off the main décor…how cool is that. This helps for easy viewing. I have use Prima “something Blue” paper pack for the entire mini. It can hold upto 15 pics and I plan to put all family pics here. 
 The papers are too good, I dint want to touch them, I just stamped in a few ivy’s using my new Paper Artsy stamps and let the paper and pic do the rest of the talking.

Once the album latches on to the main deco piece, this is how it looks from the side. There is more garden space on the back yard and look that tiny back door with a wooden knob. I was so reminded of snow white and her dwarfy friends who would have easily fitted in there!

More creepers climbing with lots of flowers and a lovely little bird who dint mind having a house of hos own on the roof! 
The roof is a folded cardboard piece, which I have torn in places to reveal the corrugation and dry brushed using Gesso to give the weathered white washed look. I think the bird looks pretty sitting out there. I still miss a butterfly though!
Have you guessed yet…this pic should make it easy, here…
 
No, than this is it, the FINAL REVEAL…ready…here we go…
 
Yes, my good old iron! My friend for so many years…how will I let you go? I wanted to incorporate this little thing in my home décor and have been challenging myself with this thought for the past 6 months and a eureka moment happened!I had a tough time pulling the wire and knobs out , lol! That’s it I started work 2 days back..building this HOME plank by plank, page by page, leaf n by leaf and flower by flower!
This is how it looks without the album. the albu, sticks to the iron with velcro strips!
I am so so so satisfied as a re cycler and a crafter to have done this. My house is 10yrs old and am planning a painting and make over session starting next month and this little deco piece is just the start to it…it is going to find a prominent place and a constant reminder of “lasting friendship” Lol!
I am very eagerly waiting for your feedbacks on this…I just love to read each and every word of it. Thank you so much for stopping by and hope you had a pleasant stay in my house. Welcome again.

I would love to have my “cottage” enter the following challenges…

CraftHoarders Anonymous Challenge- recipe challenge, have used DI, acrylic paints, seam binding, jute twine for creeper, wet and dry embossing, die cuts , wooden knob and loads of flowers!
InspirationDestination – Anything Goes
SOS – hidden element ( I hope you liked mine! )
Alphabetchallenge blog – ‘X” for experiment…it was more than that working with the hidden element here!
Crafting byDesigns – Anything goes
Not JustCards Challenge – Anything Goes Re Cycle, Re purpose and Re invent- Anything goes but re cycle
613 Avenue Create- Anything Goes with techniques( wet, dry embossing, hand made flowers, altered item, stamping, distressing, faux wood panels, dry brushing, scoring and folding for accordion album, stamping on metal)
ArtistTrading Post- New beginnings ( new lease of life to an old iron, new stamps, brand new home
 décor piece for my house!)
Craft forthe Craic- favorite word ( I have fav phrases!)


Until my next creative journey,
Happy Crafting and Re cycling.

Big hugs.


Sunday, 11 January 2015

Turning 18...a whole NEW world!


Hello Crafters

Welcome today to my page with something really NEW from my side for this new year!
The challenge this month at Anything But A Card ChallengeBlog is “ NEW BEGINNINGS”. You can create anything your heart desires EXCEPT a card and do stick to the theme!
I thought turning 18 opens up a whole new world for any kid and couldn’t resist sharing what I made for that milestone birthday!
If you have read the title and are wondering even remotely, if it’s ME…NO..NO! I wish I could get back to 18…such wonderful, carefree days, Do you ever feel that anytime or is it just me???
Well, coming to the project, I made this for a mother who wanted to gift something “unique and special” to her daughter on her 18th birthday! She wanted her daughter to treasure it for a long, long time and I just knew I had to do this one..

Have a look…I made a pocket album with lots of inserts, tags, photo mats, spaces for journaling, stamping and of course to showcase a bit of my handmade embellishments too!

Since it was for a “little lady” I stuck to pastel colors and a floral theme which I guess will appeal to her in the years to come too! I have used papers from Recollections paper pack.

I have layered 2 empty cereal cartons to make the album cover, they really get sturdy there!
There are in all 5 main pocket pages, all with different colors, have inserts in them and some inter active elements too.

Album making is a new experience for me, this is probably my 3rd in the last one month, yes I am addicted to making these now!


I love to have sentiments and quotes as inserts inside the album. It throws up a nice surprise while you are actually browsing thru your old memories…I hope you get the picture here!
I have used a lot of stamps from TH, Heartfelt Creations, Fiskars and Paper Artsy for the quotes.

I dint want to get too vintage with the album, keeping the age in mind so just got about distressing the edges with co coordinating DI.
On some pages I have a mini accordion fold out held together with a satin ribbon which can hold smaller pictures.

On the whole the album can hold up to 40 photographs…Am sure the mom is going to have a great time filling it up and I can also imagine how the young lady is going to feel when she actually receives it! I am feeling emotional here…
For the closure, I have use a broad nylon ribbon and stained it with matching DI and this makes a lovely big bow when tied up, just like a little girls pig tail!

For the front cover, I have layered some cheese cloth, a doily and then the title is on corrugated cardboard panel, torn in places and egged with gesso for the shabby chic effect!
The lovely lavender flower too is from TH tattered florals and have edged it with Prima chalk edgers in grey for that chalky look and some twisted rose buds add that perfect feminine touch…what say???
A little resin butterfly in blue hovers around too.

On the spine I have some beaded danglers made with glass beads and baubles and have told the mother to attach some of her favorite charms or pendants. She was so excited with that option.
So, that brings me to the end of the album tour! I feel I have finished off very early…feels like I haven’t shared enough!

Cheers to “New Beginnings” and hope to see you all play along. Do visit here to see some amazing inspirations from the team.

I would like to enter this album in the following challenges..
OLLCB – words to inspire (there are whole lot of them inside!)
Shopping Our Stash Challenge – Use something New – (new paper artsy and heartfelt creation stamps)
Thank you so much for stopping by and leaving your thoughts here…I love to read them all.
Until my next creative journey…
Happy Crafting and Re cycling.

Big Hugs.

Tuesday, 6 January 2015

My very own HAND MADE....

Hello crafters..
Wishing all of you a very Happy New Year..a year filled with lots of color, creativity, good health and happiness.
I had a great holiday this year end with my Bro visiting me from London and we spent some amazing family time together! He also got me a lot of crafty stuff from there (well, actually only that!)…who wants anything else???Lol!
I am having a great time using up my new supplies and for this project I have tried a couple of new things which are my favorites and I have been wanting to do for a long time!

I have altered a worn and torn cardboard box this time…so what’s new in that?
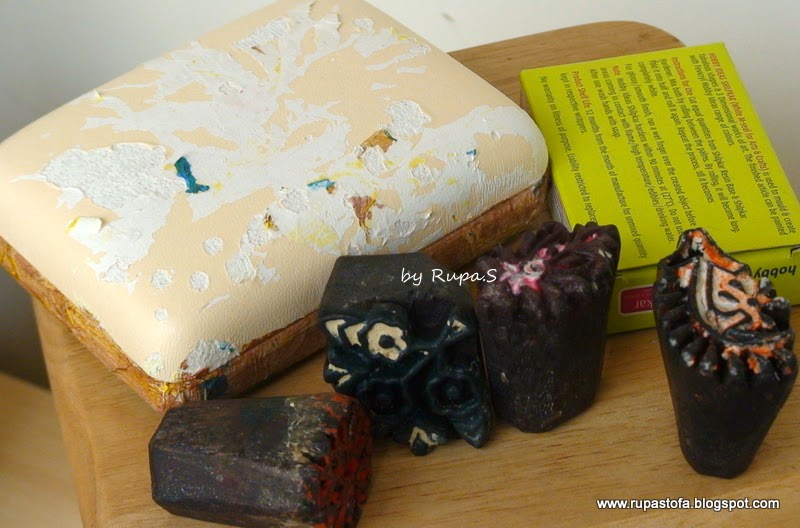
I love textures and this time I have experimented with air drying clay and wooden block prints...(These are used for fabric printing)…

I applied a layer of clay on the lid and them stamped with wooden block…just look at the impression…I just Love it!

I wanted a metallic look to the box, so went and colored it with black acrylic colors and when it was semi wet, I rubbed in silver dust. The result is an antiqued silver look and I also embedded some Rhine stones on the clay before it dried. That saved me some glue, Lol!
For the base of the box, I modge podged some tissue paper and then gave it the same metallic treatment.
For the closure, I screwed in a eyelet screw and then created a beaded dangle for it. If you observe, I have been using blues, silver, black, turquoise and yellow only…any guess why? You have to wait until the box is open for that!
The embellishment on the lid is pretty simple but a few of my fav things again..handmade flower using my new Ariana blooms die(prize win at Craft Hoarders Anonymous),a resin butterfly, some twisted rose buds and the quote says it all.

A closer look at the butterfly…have colored it at the back with pearl blue metallic colors and on the top applied rock candy crackle paint…in the cracks applied silver mica. For the antennae, I beaded some colored glass beads on to a wire and twisted its end and voila…here she is!

Are you ready to open the box…here we go.

I love contemporary jewelry and wanted to try something with stamping and when my Bro go me this new stamp from Paper Artsy, I knew it was worth the wait! It was as if I had to make a piece of jewelry only with this…

I enjoyed every bit of stamping the image, coloring with DI, sealing it with industrial resin, adding the jewelry findings , fixing little glass bead danglers and finally stringing the organza chord! Phew that was all quite a bit of new things to me but I loved the end result, MY OWN HAND CRAFTED JEWELLERY!

I think the quote in the inside lid is just perfect for the New Year! I have stamped it and mounted it on a piece of corrugated cardboard; I love its natural texture.
That kind of wraps up my 2nd project for the year! Very very soul satisfying…the thought of re cycling and also creating something new and also with all my fav elements in there!
I would like to enter my trinket box and handmade jewelry in the following challenges…
LTSCB- use items with these alphabets( L-layers, leaves, T- texture, trinket box, S-silver, string, stamps, C-chord, card board, B- beads, butterfly!
Lessology- card board central (old card board box and corrugated cardboard for the sentiment panel)
Artistic Inspiration- anything goes with a twist of new (new texture, new stamps and my first piece of handmade jewelry)
TIOT – Favorite things (texture, handmade embellishments, re cycling, jewelry making)
613 Avenue Create- Anything Goes with a twist of matching envelope (I have a matching box for a change!)
Artistic Inspirations- anything goes with a twist of new.

Until my next Creative Journey…
Happy Crafting and Re cycling…
Remember, TODAY BELONGS TO YOU…

Big hugs.


Thursday, 1 January 2015

Happy New Year with Ivy and Coffee !

Hello crafters..
Wishing all of you a very Happy New Year..a year filled with lots of color, creativity, good health and happiness.
With that said, I have a good news to share with you. I am joining the creative team of Rhedd’s Creative Spirit! It was a pleasant surprise when Sandie asked me to join and of course I gave in…I love altered art and what a way to start the new year.
So people, it’s anything goes here and ALTERED art only! Thank god for that…so play along and let’s see what you have to share with us. Do hop over to see what the rest of the team have in store for you.
Do  you want to see my first creation for the year???? Here it is….

An altered biscuit tin…I told you that my Bro got me lots of stuff…this is also from that, Lol! I couldn’t wait to finish the biscuits and was in a hurry to give the tin  a makeover!
Got lots of supplies from Paper Artsy this time…I heave used their Limited Edition Fresco paints in 2 colors to layer up the tin. I gave time between coats and shaded with the colors and once dry, used Elizebeth Borer stamps to dress it up! The colors used are Chartreuse and Seaweed…loved the end result!
Some amazing stamps I must say…just look at this Ivy Queen! MY god, I just loved coloring her with DI and then took the negative of this ornate oval die cut and gave it the faux wood treatment. Colored it with acrylic colors and framed the lady in there! She looked amazingly beautiful and comfortable in that wood frame..what say???

On the sides I used the PA Jofy stencil and crackle embossing paste . I left it to dry naturally and dint want to color up the cracks at all..I think it looks plain and nice against the brown- green.
I stamped some  ivy creepers and the sentiment on tissue paper and used gel medium to stick it on the tin.
On the back side, I stuck a yearly calendar just so that this can be used as a pen stand on the table! Pretty functional eh???
Now comes the embellishments…The lid of the tin has a lovely vintage rose using TH tattered florals die, seated on a bed of coconut coir for dimension! The leaves are all from CLD tropical leaves, though I would have loved to have some ivy hanging there!
I have fixed a metal handle on the lid and colored the butterfly with alcohol inks too. Two winged beauties on the front panel…what can I ask for???
Well is that it…what do you think happens when the lid is opened????

Out comes…this!
An album…NO…a junk journal made from paper scraps, PP all dyed with coffee! 
Yes COFFEE stained papers,  folded with some pockets, doilies, interesting knick knacks here and there…all hand sewn together with lots of LOVE. Am not getting into the details of the making here…maybe a dedicated post later on this.

Just stopping by a few favorite spots in my journal….
It is held together with Ideology clasps and some metal charms.
It’s unbelievably addictive to hold this journal to your nose and keep smelling…I HATE to drink coffee but I LOVE to smell this…very very relaxing! 
I wonder if I will ever have the heart to write here.
Well that’s it crafty peeps…my tryst with a tin and coffee stained papers!
Do let me know your views on this and will be back soon with a dedicated post on the making of the coffee journal. I owe it to the Cuppa!
Hope this inspires you play along!
Until my next creative journey…
Happy Crafting and Recycling.
Cheers.

For all you lovely people residing in the UK, I have something interesting for you this start of the new year...
On a different note - I would like to mention here that my brother who is based in London has launched a new mobile application called Playfolly. It has been designed and conceptualised by creative artists in the UK. Please have a look at the promo video here www.youtube.com/watch?v=SuPT3PVwy4I
If you like it, please download it for free on iOS and Android.
So, go ahead and spread the word, a small favor for me.
Thank you all.
Warm Regards,
Rupa

I am would like to enter my altered tin in the following challenges....
The Mixed Media Monthly Challenge - Something new ( have used new supplies and tried the new coffee dyed papers technique)
Our Creative Corner - Christmas leftovers( the tin has xmas cookies that my bro got from London...emptied the tin before finishing the cookies, Lol!)
Loves Rubber Stamps -Something old and something New -( new supplies, new technique, papers from my stash)
A Vintage Journey - Ring out the old, Ring in the new -(old tin, old papers from the stash, new supplies and new technique...coffee stained papers for the junk journal)
The Artistic Stamper Creative Blog - New Beginnings
Country View Challenges- Use something New To you ( have used new craft supplies and a coffee dyed papers,new technique)
Imagination Crafts Challenge- Anything Goes