Monday, 20 July 2015

ONE for the COLORFUL SOUL...

Hello Crafty peeps…
A cool welcome to all of you…yes, it’s been raining past couple of days and things around me are fresh and colorful!
Today I have a journal page that reflects the colorful side of me (wink)! I love this quote from paper Artsy and decided to make this the focal point…am sure all artists will agree with this!
I have colored the page with Faber Castell Gelatos Bubble gum, Orange Soda, Red Cherry, Boysenberry and Limoncello…that’s a riot of colors I know…love the bright shades!
Once the colors are blended I created textures with stencils and gelatos in red and blue. I also used texture paste and some random stamping. It was all about colors, textures and layers in the page..played to my hearts content.
The left top side, I created a tear and inserted some lovely textured handmade paper which feels like leather. There is also a bit of net and lace peeking there all held together with a zipper!
The focal point is a ornate die cut which had the TCW brick texture and colored with DI antique linen. I have tried the gesso resist technique here and so the bricks still remain white! Beneath is the quote from PA and then comes layers of texture using paper scraps, lace, woven mat, burlap all raised up with foam dots!
I wanted it all on this page! Which is why the flowers are just plain simple white. Recently I created a whole lot of flowers using the Modge mold and Plaster of Paris and am loving these white ones…you would have seem them in my previous projects too!
I have edged the page with red dry pastel and then with black. The ornate corners are using TCW stencils and texture paste. There is also some faux stitching in white and some color splats too which bring the whole thing together.
I have to give credit to the following mood boards and challenges that inspired me with this riot of colors…
Our creativeCorner – Mexico moods
We Love ToCreate Ch Blob- Ag mixed media
That CraftPlace – Words
Frilly andFunkie – raise it up
All Sorts ChBlog-add a flag/banner
That’sCrafty ch blog- Stencils and masks
MIXED MEDIA WORLD - Stencils

 Thank you so much for stopping by.


Until my next creative journey,
 Happy Crafting and re cycling
Cheers


Friday, 17 July 2015

Light it up!

Hello Crafty peeps…
I welcome you all today and would like to share a 3D project. Do you believe that inspiration comes from any where??? 
Well, for me this project  is proof for the above statement…
A couple of days back, I had just “switched off” from my creative mode and was relaxing watching T.V as my little one was falling asleep on my lap.
I was watching a Hindi serial on prime time and accidentally my eyes caught hold of an ornate lamp shade hanging from the wall. It was a eureka moment and I just thought I had to do something like that! Well, I wasn’t going to make a lamp shade but one thing I was sure of was that I was going to have a very colorful sleep that night, lol!
Like I said, it was one heaven of a sleep! (no hell, here please)…so many visuals crossing my mind and the next day I just googled to see if there anything called” floral chandelier” in reality and believe me, the options were endless!
T
This one caught my attention and was very close to the “visual dreams” I had the previous night! 
So here is what I made…
The  Sizzix  flourish alterations die is a my new purchase and I am so happy I could use them in a very different way. I loved the ornate swirls and it was just perfect for the project!
This is what I started out with for this project.
 All the flourishes are cut from my little one’s play book..the hard bound one. It’s amazing how the Sizzix die cuts it like butter. I joined 2 pieces back to back to make really thick and sturdy.
First, I gessoed all the flourished with a sponge and also the foam tape ring and some twigs from the garden. Once the flourishes were dry, I used versa mark and clear UTEE to seal the white gesso. This gave the flourishes an amazing wrought iron kind of finish, just what I wanted. I also stamped some Bo Bunny text on the ring randomly.
I then scrapped the white paint from a few places for that shabby look! With 8 flourishes, one tape ring, 4 twigs I started making my chandelier! This one was going to be a candle decoration that can be on display anywhere in the room!
I fixed the legs for the chandelier with the twigs and started arranging the flourishes on four sides of the ring. (I used up 4 here) and the remaining 4, I cut the split curl part to form the ornate “legs” of the chandelier!
The remaining part of the flourish hung from the ring. So the entire ring is now covered with the ornate metal work! Once the main frame work was ready, the rest of it was easy!
I made some handmade blooms with TH tattered florals inked with DI and stamped with a plaid texture stamp from American crafts. A few leaves for the fresh look and those tiny flowers are using the modge mold and Plaster of paris which I have inked too.
Ta da, it’s ready! Just what I had in mind and when I lit the candle… I was just taken to another world! I loved what I saw and tried to take a pic in different times of the day…
In the evening..
At night…oooo, I love this one!
That’s it…I have decided to watch more serials from now on..lol! Do share your experiences of how you have got your inspirations from the most un expected source!
 I would like to have my floral chandelier enter the following challenges…
As You like It Challenge- fav style/ color (shabby chic and pastel colors)
Fab 'n' Funky Challenge- flower delights
Beyond Grey Challenges- Dimensional project
Until my next creative Journey,
Happy Crafting and Re cycling.

Cheers.


Sunday, 12 July 2015

"WITH LOVE" from grandma

Hello Crafty peeps…
Welcome to my page and today I share with you my DT post for Anything But A card where the theme this month is Anything Goes and that’s undoubtedly the favorite for many. So get your crafty stuff out and hope to see you all play along.
As always, I have an upcyled, altered project in my favorite vintage theme.
Before I start to show you what it is , I want to know what is that one thing you can’t do without when you are travelling? For me, I need that little trinket/vanity box that can house all my accessories! I love to take a few complimenting sets of neck piece, earrings, bracelet and my watch! I love playing the mix n match game with these!
I decided to make one that is compact and durable to carry these. Here’s a biscotti box that underwent a cosmetic change
to become THIS…

I wanted to replicate one of those antique, old, vintage hand me down treasures from grandma type of a box! This box was originally a glossy grey one which of course, I was going to change but I liked was the inside. It had these cute little compartments which was perfect for this project.
Step 1 – I was clear I wanted the paper from Ideology “lost and found” paper pack and also took complimenting fresco colors from paper Artsy.
After a coat of gesso, I went about sponging the colors in layers till I liked what I saw. I had a lovely, grungy wooden like box and I was already beginning to love the texture the sponge had created. I have used Chutney and Tikka from paper artsy to get this lovely color!
Step 2- Once the colors dried, I took damask stencil from TCW and some Wendy Vecchi embossing paste and covered the top of the lid. I wish I had used gold embossing paste, but never the less, once it dried I placed the stencil again and rubbed Inka Gold. I wanted a subtle highlight of gold and so used old gold here. I like the way it blends with the woody colors. Next I took out some metallic black acrylic colors and created random polka dots all over the box. This gave the feminine look to the box.
Step 3- I have used the 4 X 4 paper from the pack and was happy it just fit the base. Before adhering the pages, I stuck some black lace in random spots and then created tears in the PP…the antique, worn out look you see! Some ore Inka gold in the crevices and then I inked all the edges with Archival black ink and Potting soil to really age the box and the paper.
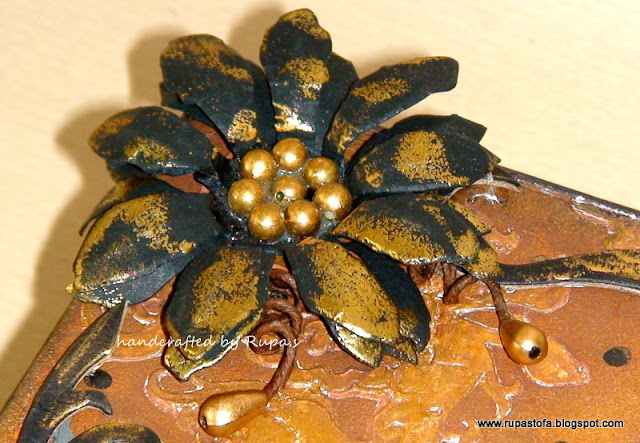
Step 4- For the embellishments I made a layered TH tattered florals flower with black CS and heat embossed the edges with gold . The Sizzix flousih die cut too is from black CG and has some gold highlights. 
I created the same wood like strip on black CS and heat embossed TH Artistry sentiment in black. I have distressed the edges and ripped it too. The ornate metal pull out too has been aged with old gold highlights.
 A few coconut shell buttons with gold run ons adorns the front the box.
Ready to open my grandma’s treasure???
Here it is…
Step5- I have kept the same colors scheme here too but have stenciled the damask here with archival black. You can see the gold highlights here too.
 I decided to keep some grandmas memoralia here…and so this pic from the photo booth crumpled to get the aged look. Along with that I have pinned some tickets and a small post card stamped with Itsy Bitsy stamp on coffee stained paper. The black border is a memory box die. Family ties it is…as I told you, I wanted this to look like one of grandma’s treasured box!
Step 6- I sponged the same colors on the compartments and rubbed in Inka gold. The little boxes are covered with some marbled wrapping paper . I liked what I saw finally and here it is with all little thinks I cant do without when I am travelling.
This is going to my travel companion in future and I will always treasure this antique piece from Grandma. Lol!
Do let me know your views and thank you stopping by today. I hope this inspires you to play along.
 I would like enter my grandma’s box in the following challenges…
A VintageJourney – Destinations
Make ART challenge blog- use polka dots
Un rulypaper arts- family ties
Stamps and stencils -happy holidays
art by miran Ch blog -Ag
Craft Stamper magazine- Ag use a stamp
Polkadoodles ch blog- add some embossing
Crafting by Designs - re use/Re cycle
STAMPlorations Ch blog- Mixed media but no card
Until my next Creative journey,
Happy Crafting and Re cycling,
Hugs.


Wednesday, 8 July 2015

hand in hand...

Hello Crafty peeps…
A big sunny welcome to all of you. It is quite warm here in this part of the globe and how I miss the beaches in Bangalore! It is such a lovely place to hangout with friends or your loved ones! I am sure all of us have fond memories and some good times to catch up when we think about summers and beaches…
And so…I decided to bring the beach” to my living room with this altered project for you. Trust me and this whole thing smell good too cos what I have altered is an “ex-fabric conditioner” bottle, lol!
I went about creating random textures with modeling paste to white I have added some white glue so that the paste adheres well to the plastic bottle. I applied the mixture with a spatula so that it is uneven and coarse.
When the paste was wet, I stuck some cheese cloth for added texture. Once dry, I sprit zed the bottle with a lovely beachy blue ink diluted in the mister and allowed it to run and take its natural course. I liked the pattern it created just like the waves and in places I just kept it white. Some color splats in brown and black adds more texture.
I have never done “so much white” till now…this is again stepping from my comfort zone!
For the base I applied some sand texture paste and colored it with Walnut stain DS to give it a sand and moss look. The fence it made with twigs from the garden and I have brought them together with a piece of twine.
The shells and starfish are all made with plaster of paris and silicon molds. My first try with POP and I just love how it takes to the colors applied. I just applied some blue ink, walnut DS and lined it with archival black ink. Love the “dirty look” here!
I decided to bring in a couple to walk on this beach…it’s a print from the net and I made them a cozy frame by mounting the picture onto chip board and giving a border with roller paper chord. I have applied brushed pewter DS randomly and embellished the frame with shells collected over the years! 
You can also see a tiny POP flower…my fav embellishment in this project. A metal chain added and the frame casually dangles from the bottle…wait for other side!
The caption again is from the net and thought was perfect for this project. I hand wrote it on tissue paper and adhered with gel medium.
Now, for the back…continuing with the same texture, you see the other side of the chain that held the frame together! This side there is a wicker heart and some dolphin charms all held together with an Ideology Trinket pin ”memoirs”.
I have covered the mouth of the bottle with twine and applied gesso over it for some texture.
The bottle is filled with white sand and I gathered a whole lot of dried twig fro the garden for a dry arrangement. The twigs have been dry brushed wit gesso randomly and I have those tiny little POP flowers! Don’t they look beautiful?
For the first time I have kept all my flowers “virgin white” and yes, that is a bold step from me to restrain them from coloring or inking. I quite like the “white white” look here as it goes with the theme. I am already making a bunch of embellishments with POP as it is easy to mix and dries in a jiffy (just few mins)!!!
Here is the quote for you once more..

Some people see more in a Walk on the Beach
than others in a trip around the World.

How romantic and true!

Well, that brings us to the end of the walk. Hope you enjoyed and I would love to read what you have to say about this.

I am entering my bottle beach in the following challenges…
Anything ButCute – summer romance
That Craftplace – AG mixed media
Craft forthe Craic- summer fun
Lessology – wood grain
TIOT -  In the Frame
Until my next creative journey,
Happy crafting and re cycling,
Cheers.


Sunday, 5 July 2015

My Shimmery Feet

Hello Crafty peeps…
Welcome to my page and I have a special project to share to day!
This is my submission project for Colour Arte as they are having a DT call.

 I have always loved playing with paints and what if I can re cycle, alter and do a 3D project all the same time, then it’s a creative delight. Well, the icing on the cake is that it is functional too!
I have never shied from hoarding trash and have never been stingy in giving them a makeover too! Today’s re cycled item too is one that I have hoarded for a long time now. One that you see in your hotel rooms and I dint dare to use it, instead got a few pairs home to alter them…
You want to see what it is? The good old…
Yes, this is the blank canvas I started with and this is how it looks after the grand makeover.


Now, over to the steps in this transformation. Please sit back for a lengthy post and am sure you will enjoy this!
I gave a stiffener inside the foot flap with an empty cereal carton chipboard to make a surface workable.
Covered the front flap with tissue paper(that you get with shirt packaging). Once that was dry, I started building up the textures on it.
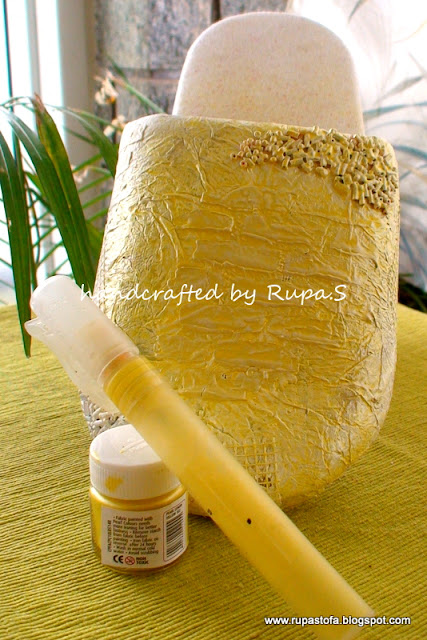
I used TCW bricks stencil and modeling paste for random textures, few strips of dry wall tape and then took out a strand of micro beads from a broken neck piece! I have been so happy to part with a fav accessory of mine, lol! Than came a coat of gesso and my canvas was ready to take the paints!
You can see the yummy textures of the tissue paper, stencil bricks, dry wall tape and the beads here!
I decided to make my own shimmery sprays with metallic acrylic colors and the good old mini mister. I mixed a little water and made my customized set of colors. Sadly, I don’t own any colour arte products but on the flip side, I adventured making my own color sprays and I really liked what happened!
I started with the lightest color, shimmery yellow and let it run down naturally. 
Once that was dry I moved to metallic green and then finally the blue. I played around with these colors until I liked what I saw.
 I also rubbed in some metallic blue paint directly on the beads and also “washed off” some colors from the center to have a distressed look.
Time for some random stamping with Bo Bunny script and number stamps. I also did some color splats with pearl white, pearl black and pearl red paint. I rubbed archival black ink around the edges for depth.
 I cut a piece of PP from Ideology “Lost and found” paper pack to decorate the slipper base and have inked the edges with faded jeans DI and archival black. I have used Heidi's Swap honey comb stencil and modelling paste to give texture here.
Time for embellishments! I stuffed in some scrap paper into the flap pocket and then some coconut coir to make a nice big platform for the birdie to stay! The ferns falling are all die cuts from Tattered lace and CLD olive branches, all which have been inked and molded for dimension.
The birdie on the little basket with eggs is a gift from a crafty friend and am glad it found the perfect spot o sit! The little pine cones are picks from my European holiday! I have applied some pearl white in the edhed for some shiner. It is sad that the photographs don’t do justice to the shimmery colors.
The flowers are all hand made using Joy crafts die and TH tattered florals die. The sentiment is from KaiserKraft and I wanted this to be a reminder everyday when I see this project. We often forget to do so!
I told you this was functional too right apart from being a décor piece…well I cut some white printer paper and stamped this lovely vintage book page with Whimsy stamps. A colored wooden peg that says “embrace “ is the finishing touch and some jute twine to make this piece hanging from the wall.

That is it…an up cycled, altered, functional 3D project that makes a lovely décor piece and a memorable gift too, any takers???

As I told you this is my submission project, I thank you all taking the time to visit my blog today and do let me know what you think about this altered slipper!  Definitely doesn’t look like Grandmas BIG FEET now, lol! Your comments make my day. Keeping my fingers crossed for the selection, I need all your wishes.

Until my next creative journey,
Happy Crafting and Re cycling.
Cheers.